
Photos Clean Up: Remove Objects and Restore Your Edits
To use Photos Clean Up on a supported iPhone or iPad with version 27, open a photo, tap Edit, then Tools and Clean Up. Tap, brush, or circle the distraction. Review the result before saving. This guide explains Apple's documented controls, including Mac steps, recovery options, and missing-tool checks.
1. Check Photos Clean Up support before opening a picture
Clean Up is a Photos editing tool powered by Apple Intelligence. Start by checking your device and software, rather than looking for a Siri command. The steps below follow Apple's current iOS 27, iPadOS 27, and macOS 27 manuals. The current support list includes iPhone 15 Pro models, iPhone 16 models or later, iPhone Air and Duo; iPad mini with A17 Pro or A20 Pro and iPads with M1 or later; and Macs with M1 or later or MacBook Neo with A18 Pro.
Apple requires the device and Siri languages to match a supported language; individual features can have narrower availability. Check the compatibility guide for Siri AI separately. Apple lists advanced photo editing as available in the EU on supported version 27 devices, while Siri AI has different platform restrictions there. A working Photos button therefore does not establish Siri AI eligibility. Clean Up removes distractions; Extend changes the frame and Reframe changes perspective. This guide covers only the first task.
2. Open Clean Up and select one distraction
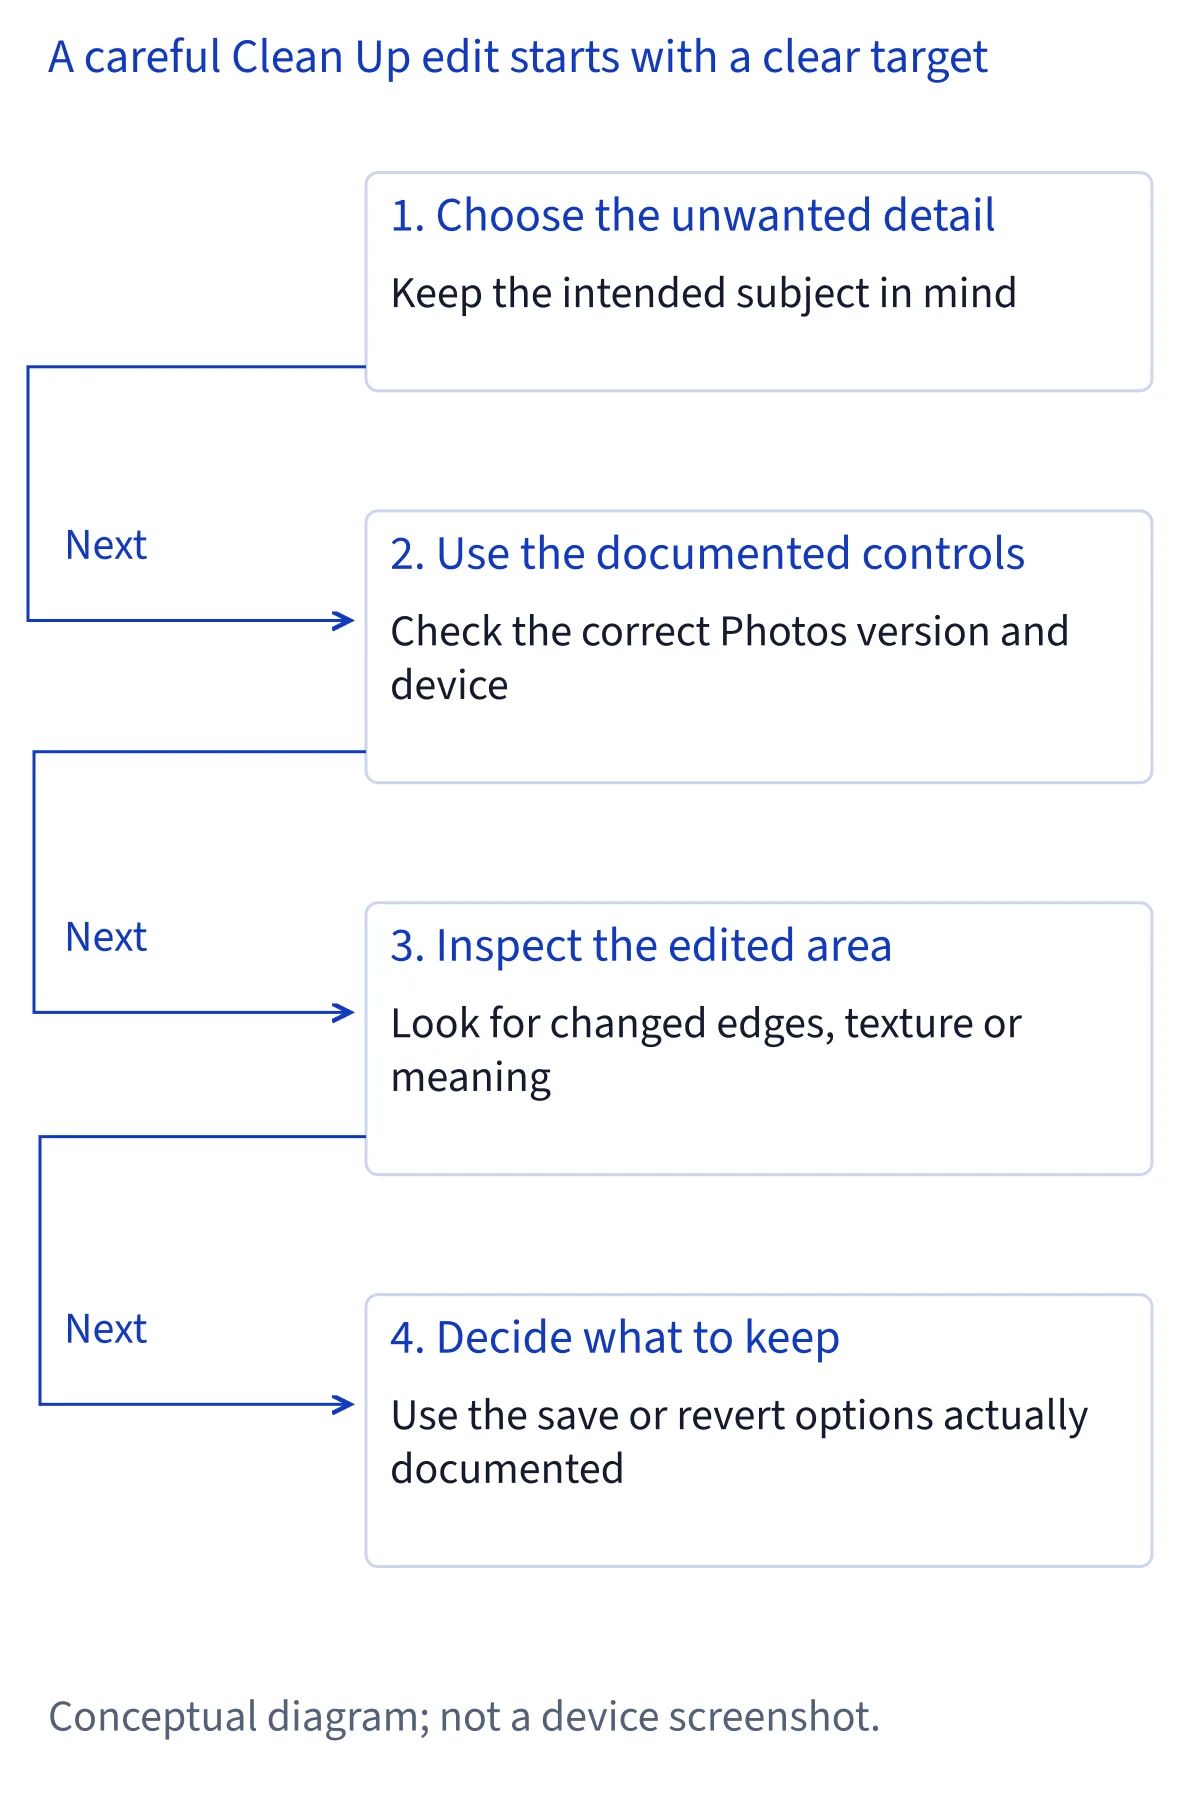
On iPhone with iOS 27 or iPad with iPadOS 27, open Photos and open the picture you want to edit. Tap the Edit button, tap Tools, then tap Clean Up. This is the current documented path; an older tutorial showing Clean Up in a different position may describe another Photos version.
Tap an unwanted object, brush across it, or circle it. Photos may highlight some items automatically; tap a highlight if it identifies the distraction you actually want removed. Automatic highlighting is optional assistance, so the absence of a highlight does not prevent a manual selection.
Use two fingers to pinch, zoom, or pan before selecting a small object. As a practical editing approach, start with one background distraction and inspect the replacement before continuing. For example, try the stray object beside a plate before attempting something that overlaps the food. That sequence makes a poor change easier to spot and undo; it is editing advice, not an Apple guarantee of better processing.
3. Choose processing and finish the removal
On the documented iPhone and iPad version 27 interface, tap Auto during Clean Up to choose Auto, Fast, or High Quality. If you use High Quality processing, Apple's instructions include tapping Clean Up after selecting the material to remove. Check that step before concluding that your selection did nothing.
The manual names these choices but does not promise a processing time, a fixed number of attempts, or a perfect result for any setting. Choose a mode that is available on your device and judge the actual output. Do not treat the appearance of the mode selector as proof that a request has finished.
Apple says intelligent photo-editing features that depend on server-side models can have daily usage limits. Those limits can vary with the feature, request complexity, system demand, and policy. If Photos shows a limit or processing message, follow that message rather than repeatedly enlarging your selection. This source review does not establish which processing mode uses which model or a universal offline workflow.
4. Compare the result and save only useful changes
On iPhone, Apple's editing manual says you can tap the photo while editing to compare the edited version with the original. Inspect the area you removed at a useful zoom level, then look at the complete picture. Check for repeated textures, broken edges, altered lettering, or a replacement that draws more attention than the original distraction. These are suggested review checks, not additional Photos controls.
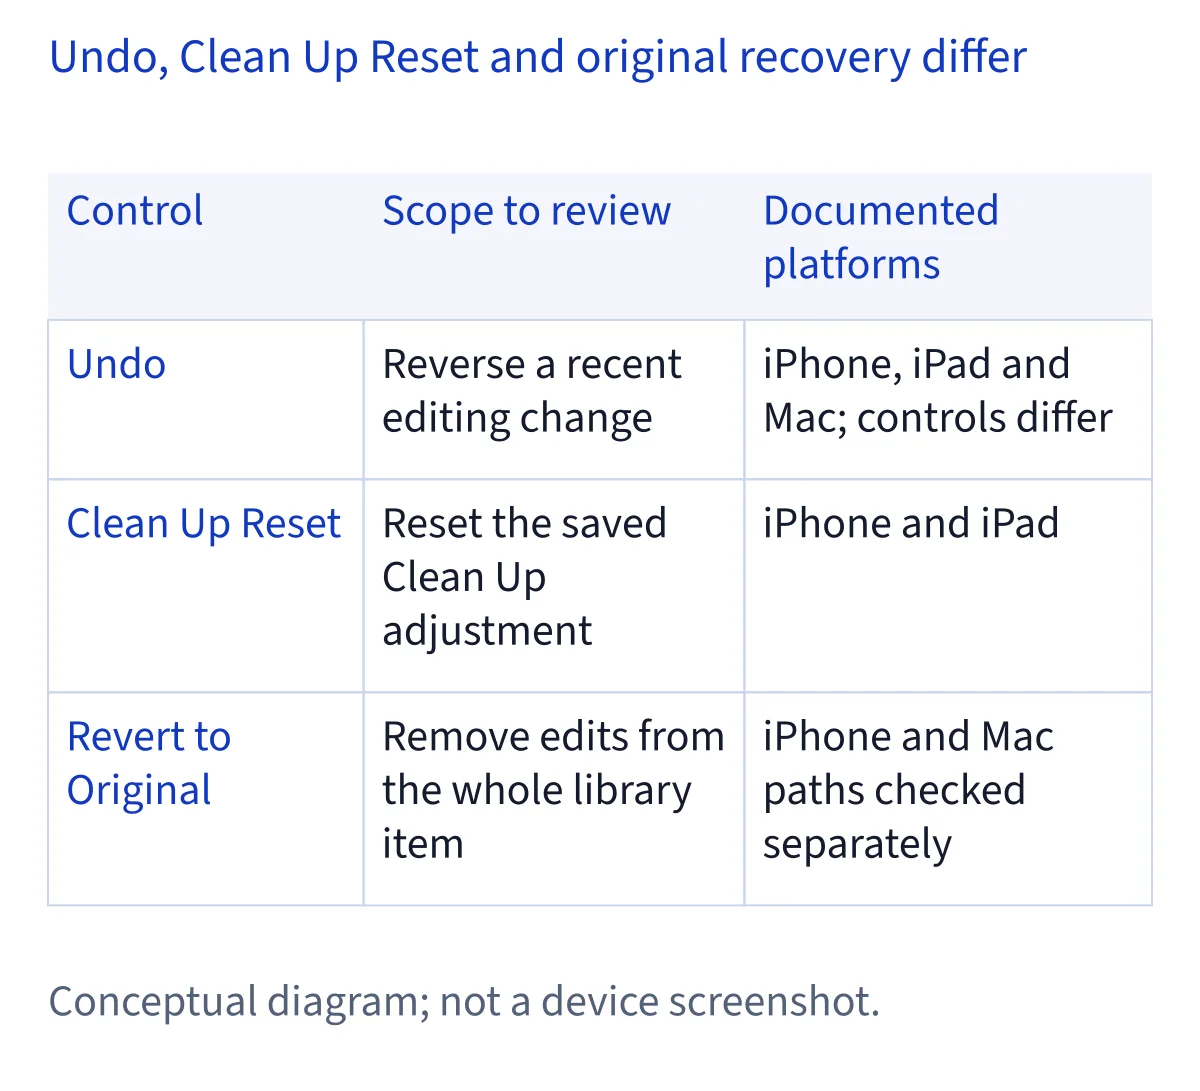
If you removed something you wanted to keep, tap Undo. The iPhone editor also documents Redo for stepping forward through editing changes. On iPhone and iPad, the Clean Up instructions say to tap the Done button, then Done to close the photo. In High Quality mode, complete the separate Clean Up action first.
A clean-looking fill is an edited result, not evidence of what was physically behind the object. Keep that distinction when preparing a product photo or a record of an event. Our privacy guide provides broader context for Apple Intelligence; this article makes no claim that every photo-editing request stays on the device.
5. Reset Clean Up or revert the library photo
To undo saved Clean Up changes on iPhone or iPad, reopen the photo, enter Edit, choose Tools and Clean Up, then tap Reset. That is the tool-specific recovery route in the current manuals. Use it when the removal itself needs another attempt.
To revert the edited library item more broadly on iPhone, Apple's separate recovery guide says to open the edited photo, tap More, then Revert to Original. Decide whether you want to reset Clean Up or return the entire item to its original appearance before choosing a recovery action. With iCloud Photos, edits are saved across your devices, so another synced device should not be treated as an independent backup.
These instructions concern the editable item retained in Photos. Do not assume a downloaded image, exported file, messaging attachment, or recipient's copy retains the same original and edit history. If you need a separate comparison or delivery version, keep the library item and check the actual file you intend to share.
6. Remove a distraction and compare edits on Mac
On Mac with macOS 27, open Photos, double-click a photo, and click Edit in the toolbar. Click Tools, then Clean Up. Choose the brush below Erase; optionally adjust the Size slider. Click, brush, or circle the object. You can click automatically highlighted items, use the Zoom slider or pinch on the trackpad, and drag the enlarged image to reposition it. Click Done when finished.
For a before-and-after check while editing, hold the Compare button or the M key to see the original; release it to see your edits. Use Edit > Undo or Command-Z to undo the last change. To remove all edits, select the photo and choose Image > Revert to Original, or use Revert to Original in the editing toolbar.
Apple separately describes a brush below Retouch for blemishes and dust specks. Choose the control for your task rather than assuming both brushes perform the same operation. Apple also warns that brushing a person's face with Clean Up may produce a pixelated blur.
7. If Clean Up is missing or the result is disappointing
If Clean Up is missing, first confirm that you opened a photo in the editor and checked Tools on version 27. Then verify hardware, installed software, matching supported device and Siri languages, and regional eligibility against Apple's current requirements. A supported operating system alone does not establish support for Apple Intelligence. If a tool appears but processing fails, record the exact message and use the troubleshooting guide to distinguish a missing control from an unsuccessful request.
Apple still says Clean Up will not work on devices purchased in China mainland. For supported devices bought elsewhere, it also states a restriction when both your location and Apple Account country or region are China mainland. A social screenshot reporting restored access does not change those published conditions.
If a removal looks wrong, undo it, try a more precise selection, or keep the original. There is no obligation to accept a generated replacement. Review the sources below, checked November 9, 2026; this is a documentation-based guide, with no claim of device testing.
Common questions
Does Photos Clean Up require using Siri AI?
Apple documents Clean Up as a Photos tool powered by Apple Intelligence. The steps here start inside Photos and do not require a spoken Siri AI request. Photo-tool availability and Siri AI eligibility are separate checks: Apple's current documents describe different regional and platform conditions. Seeing Clean Up does not prove that Siri AI is available on the same device.
Can I undo Clean Up after saving a photo?
On the documented iPhone and iPad version 27 workflow, reopen the photo, choose Edit > Tools > Clean Up, then Reset. Apple also documents broader Revert to Original actions for the Photos library item on iPhone and Mac. Those recovery controls do not establish that every exported image or shared copy preserves the original or reversible edit history.
Why does a selected object remain in High Quality mode?
Apple's iPhone and iPad instructions include a separate Clean Up tap when you use High Quality processing. Complete that action after selecting what to remove, then inspect the result. If the app instead displays a processing or usage-limit message, follow it. The documentation does not give a universal completion time or guarantee that every selected object will disappear cleanly.
Does a mainland-China screenshot prove official support?
No. A social post can report one person's experience, but it cannot establish official regional eligibility or our own successful device test. Apple's Clean Up requirements still state mainland-China restrictions. The screenshot's separate Clean Up, Extend, and Reframe buttons also do not prove that all three tools processed an image successfully or that Siri AI became available.